Why You Should Embrace The Travelling Part Of Travelling

by Lindsay Shapka in , ,


"Europe? I would go, but the flight is way too long." 

"Don't take the train! It will take you forever. You're better off flying or not going at all!"

"Oh, don't go to that city! It's 3 hours away! Go to the one that is only 30 minutes down the road."

Sound familiar?

If you find yourself still wanting to travel long distances despite comments like these, then you have a kindred spirit in me! I can't tell you the number of times that I hear lamentations from people claiming that they would travel more, but can't stand airports, delays, long drives etc.

But, to me, the travelling part of travelling is often when the magic happens.

Let me explain. 

Life is busy, really busy. I rarely give myself permission to sit still, but on a long flight, drive, or travel delay, I am forced to be in one place with nowhere to go, no deadlines, no frantic need to find something to do. My only job is anticipating the next adventure, flipping through a magazine, watching a movie, and sipping on an overpriced (or free if you are on an international flight!) beer.

It's time when I can let my mind wander to places that it has been kept from because of work. I can write about what I want to, and read what I want to.

Even better, once on your plane, bus, or train, everything is out of your hands. You don't have to navigate, drive, worry about getting there on time. If the flight is delayed, the airline has to deal with it. (Ya, delays suck, but really, they aren't the end of the world!). Your only job is to sit back, relax, and let someone else take care of you. How nice does that sound!?

Meeting fellow travellers also adds to the adventure. You never know who is going to sit beside you — trust me, I have met some incredibly interesting people on planes, buses, and at the airport bar! 

The travelling part of travelling is also a really great opportunity to see the world around you!

Flights give you an incredible bird's-eye view of the places that you leaving and are going to. I will never forget when I flew over the Atlantic on a clear night and saw the lights from boats underneath us for most of the flight. Incredible.

Long train rides take you through mountains, cities, and landscapes that most roads don't go near, while buses give you a chance to see cities and countryside that you would never see if you stayed in one place. 

I'm not going to tell you that a day filled with 9-hour flight, a 3-hour layover, a second 4-hour flight, and then a 2-hour bus ride isn't a long day. But instead of thinking of it as a means to an end or a hinderance to travel, try looking at it as part of the adventure, and maybe you might start to like the travelling part of travelling too! 

Related Posts


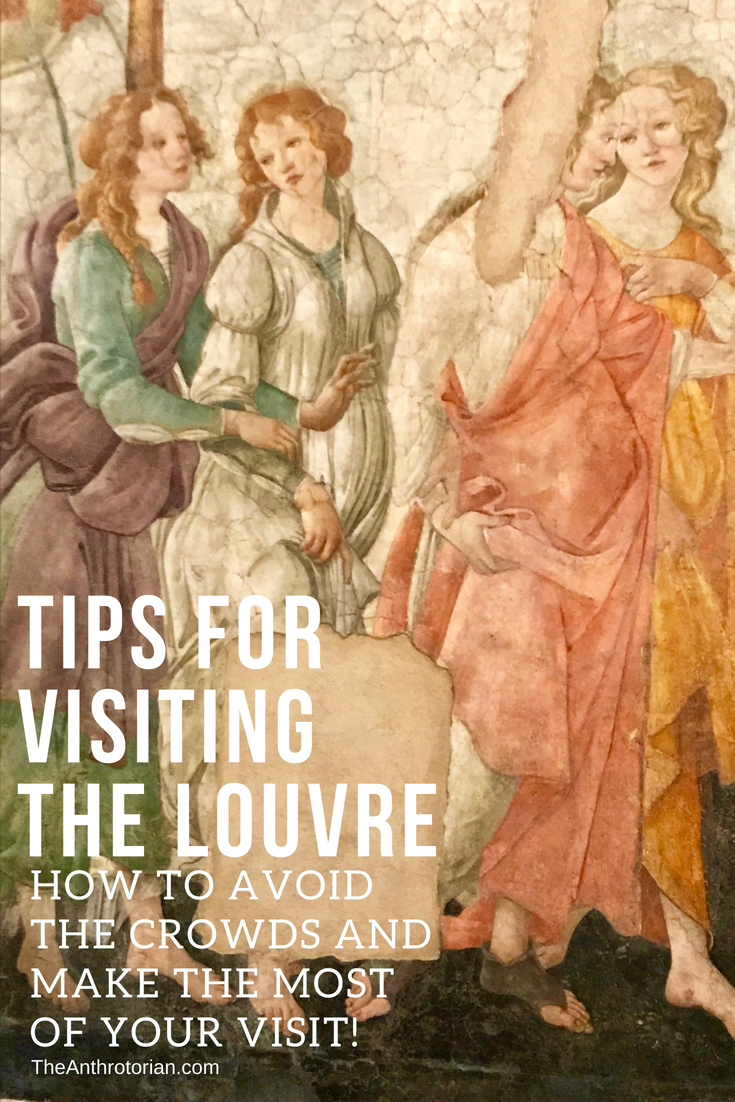
Tips For Visiting The Louvre: How To Avoid The Crowds and Make The Most of Your Visit

by Lindsay Shapka in , , ,


Whether you are a super fan of art and history, or just want to say you've seen the Mona Lisa, a visit to the Louvre is a must-do if you are in Paris. This fortress turned palace turned gallery is now a massive, sprawling, and overwhelming collection of some of the most important pieces of human history.

Making the most of your trip definitely takes some planning — I've visited the museum twice, and still haven't come close to seeing everything! 

First, let me tell you a little bit of the history of this famous museum (scroll down if you'd rather just read the tips!). 

Construction on the Louvre began in 1190, but it wasn't a fancy palace. At the time, it was located on the western edge of Paris, and it was built as a fortress to help protect the city. It had a moat and everything! The city quickly grew, engulfing the fortress, and King Charles V decided to convert it into a royal residence in 1364. From then, until the present, the building has been in constant renovation with rulers like King Henri IV, King Louis XIV, and Napoleon Bonaparte all adding new buildings, wings, galleries, and elaborate decoration to the complex that they called home. 

In 1692, artists began to hold shows in a few of the more public wings, and slowly, more and more of the buildings began to fill with art and artifacts from all over the world. By 1882, the majority of the Louvre had become a museum. In 1939, during WWII, the museum works were evacuated, except for the largest pieces, and were hidden away all over the country. It re-opened while still under occupation in 1940.

Now, thousands ride the escalator beneath the controversial glass pyramid (built in 1989, many Parisians consider it to be an eyesore), to visit the masterpieces and walk in the footsteps of some of the most influential figures in European history. 

Tips for visiting the Louvre

Here are my top tips to help you plan your visit to the Louvre Museum.

Avoid visiting from June-August

The crowds will be overwhelming and you will have no chance of getting near, or being alone, with any of the art or artifacts. 

Visit on the days that the museum is open late

The museum is open from 9 am — 9:45 pm on Wednesdays and Fridays (it closes at 6 pm on the other days). If you can, plan to visit on one of the extended hour days. It will give you a chance to take in more, while still being able to leave the museum for fresh air and food breaks. Plus, once dinner time hits, there are far fewer people in the galleries. In fact, in my experience, the galleries are largely empty by 8 pm. At 9:30 pm, I found myself completely alone in the gallery that houses the Mona Lisa — it was incredible. 

Choose your entrance 

There are three entrances to the Louvre. Most people will head to the glass pyramid entrance because it is the flashiest, but you can also enter through Porte des Lions or the Galerie du Carrousel and they are usually not as busy. 

Get a map

The first thing to do is pick up an info map (or you can check it out ahead of time here). The museum is huge, and you don't want to waste time wandering aimlessly.

Audio guides are your friend

There are audio guides that you can rent which are actually nice to have. They give you some really interesting information, and also block out the sound of the other visitors, making you feel a bit more immersed in the history that surrounds you. There are also smartphone apps that you can download instead, which can help you preplan your visit. 

Pick up postcards of your favorite pieces

You can take photos of EVERYTHING in the museum — yup, even the Mona Lisa — as long as you don't use your flash. The flash can damage the delicate pigments in paintings. Because of the damage that light can have on these works, low lighting doesn't make for the best photos. While I understand that getting a blurry photo is still better than no photo, the gift shop has beautiful postcards of all of the major works which make great souvenirs! There is a post-office on site as well if you want to mail any postcards to friends back home. 

Free coat check! 

There is a free cloakroom and luggage room if you have anything that you want to check, but they won't take bags larger than what you could carry on a plane.

Plan your meals

While there are cafes and restaurants in the Louvre, in the gardens just outside, and nearby, the prices are really jacked up. If you are on a budget, I suggest bringing some snacks with you, or walking a few streets away to find a more inexpensive spot. If you are willing to splurge a little, lunch is usually about half the price as dinner, and most spots will have inexpensive sandwiches for all meals. The gardens just outside the palace are the perfect place to have a picnic!

Watch out for pickpockets

Sadly, they target the Louvre, as tourists are so enthralled by what they are seeing they usually aren't paying attention to their bags. 

Take your time

Try not to just run from one masterpiece to another. Soak in where you are. Pay attention to the incredibly sculpted and painted ceilings, visit a gallery that doesn't have a famous work in it, explore — I promise you won't regret it! 

Pin Me!

Tips for visiting the Louvre
Tips for Visiting The Louvre


Hostel, Riad, Tent, Or Hotel? Your Guide to The Different Places You Can Stay While Travelling

by Lindsay Shapka in , ,


Where do you stay when you're travelling? 

It's a question I am asked all the time, and one that doesn't always have a simple answer. Some want to know if I have a secret spot somewhere that they can try out. Some ask because they want a deal and are hoping that I know of one, and some have never really travelled before, and can't fathom not staying in a name-brand hotel, so are just curious. 

But, there is no one answer to that question, as where I stay changes every trip I take. It is based on how long I am travelling for, where I am going, how much money I have to spend, whether I am alone or with friends, and many, many more factors. 

For example, on a recent adventure, I stayed in a hostel, a hotel, a riad, a tent and a guest house — all over only 10 days!

I flew into London and knew that I wanted to stay in the city centre so I could easily walk, or take the tube, to the sights that I wanted to see. I also knew that because it was the middle of July and the most expensive time of year to travel in Europe, a hotel was not an option for me. I was travelling alone, and only spending one night in the city, so knew I would be fine with just crashing in a hostel.

I managed to get a bed in a four person female dorm (not usually my first choice) in the Piccadilly Backpackers (see image above) — located less than a block from the Piccadilly tube station and square of the same name — for 35 GBP (approx. 70 CAD). Not cheap when you look at the conversion, but still cheap for central London. The room was simple and clean. The communal showers had hot water, decent water pressure, and there was free wi-fi in the common area. It was safe, central and easy to find. The perfect crash pad. 

The next night, I needed a place to stay near Gatwick Airport, as I had a really early flight the following day. I ended up staying at the Ibis Hotel near the airport for 35GBP (approx. 70 CAD) — the same price as my centrally located hostel. What I got here, however, was a modern, clean hotel with all the amenities, my own room, TV, wi-fi, and room service. It's amazing the difference being 20 minutes out of the city will make! 

Since I started travelling when I was really young and on a shoestring budget, my first instinct is to always look for the cheapest place to sleep. But when I decided to spend a week in Morocco solo, I knew that throwing out a few extra dollars every night would get me a stunning room in a historic riad. (Plus, I am a Flashpacker now. I don't have to travel on a shoestring budget anymore!)

The view of the plunge pool from my first room at the Hotel du Tresor Riad

I found an incredible place to stay through my Lonely Planet guide (it comes in handy when booking from afar!), and made the Hotel du Tresor (highly recommended — message me if you want more info.) in Marrakesh my home base.

A traditional riad, the hotel was a series of whitewashed rooms draped in Moroccan carpets, pillows, lanterns, and art, that surrounded an internal courtyard with a plunge pool. The pool was what sold me on the place when I looked at it online because it was private, secluded and would be a must-have on +45 days. My room was 35 Euros (approx. 50 CAD) a night which included an impeccably decorated space with AC, a private bathroom, use of the pool, free breakfast, and an incredibly kind group of staffers who helped me navigate the country. 

The view from my bed in the Bedouin tent.

After a few nights in the riad, I spent one night in a Bedouin tent in the desert.

Something to note: The desert does NOT cool off at night in the heat of summer.

It was like sleeping in a sauna. There was no breeze, no AC, and the walls, floors and ceiling of the tent were draped in thick carpets making it pretty stifling. There were four of us that slept on small mattresses on the ground. The shared facilities were a three minute walk from camp and as basic as it gets (aka, a hole in the ground and a bucket with some water in it).

The night was part of a mini-tour I was on, and included dinner and breakfast. The meals and sleeping part of the tour probably works out to being about 40 CAD.

My room at the Hotel La Petite Suede in Agadir, Morocco

After the desert, I spent two nights in a guesthouse in a beach town called Agadir. The place I stayed was called the Hotel La Petite Suede and cost me 110 Dh a night (approx. 14 CAD). This got me a large, safe room with my own bathroom, and a simple breakfast of baguettes, jam and coffee in the morning. There was no AC, but there was a large window, and it was only a five minute walk to the beach.

(NOTE: I was in Morocco in the offseason and the prices I paid could be doubled, or even tripled in the high season.)  

Here are a few things to consider when you are trying to figure out where to stay:

  • Proximity. Do you want to be able to walk to all the tourist sights? Public transportation, or renting a car is not always cheap, and sometimes paying a few extra dollars to stay in the centre of a city will save you money in the long run.

  • Do you want to meet people? Then DON'T stay in a hotel. You need a hostel, or a guest house with a common area.

  • How long are you really going to spend in your room? What's the point of dropping a bunch of cash on a room you are only going to sleep in? If you aren't planning on spending much time at your hotel, then maybe you should be looking for a more standard, cheaper option.

  • What do you really need to feel safe/comfortable? Is having a TV, AC, free WiFi, or even a bathroom to yourself must haves, or are they things that you can do without? The price of rooms is often cut in half if you are willing to go with a fan instead of AC.

Related Posts


3 Islands You NEVER Want To Visit

by Lindsay Shapka in , , ,


White sand, palm trees, gentle breezes and sparkling blue water — who wouldn't want to spend time on a tropical island?! After the long, cold winter I just lived through, I would take a hot island escape in a second.

It turns out however, that not every island in this world is a so-called "paradise" destination.  Here are three islands that I guarantee you won't want to go anywhere near.

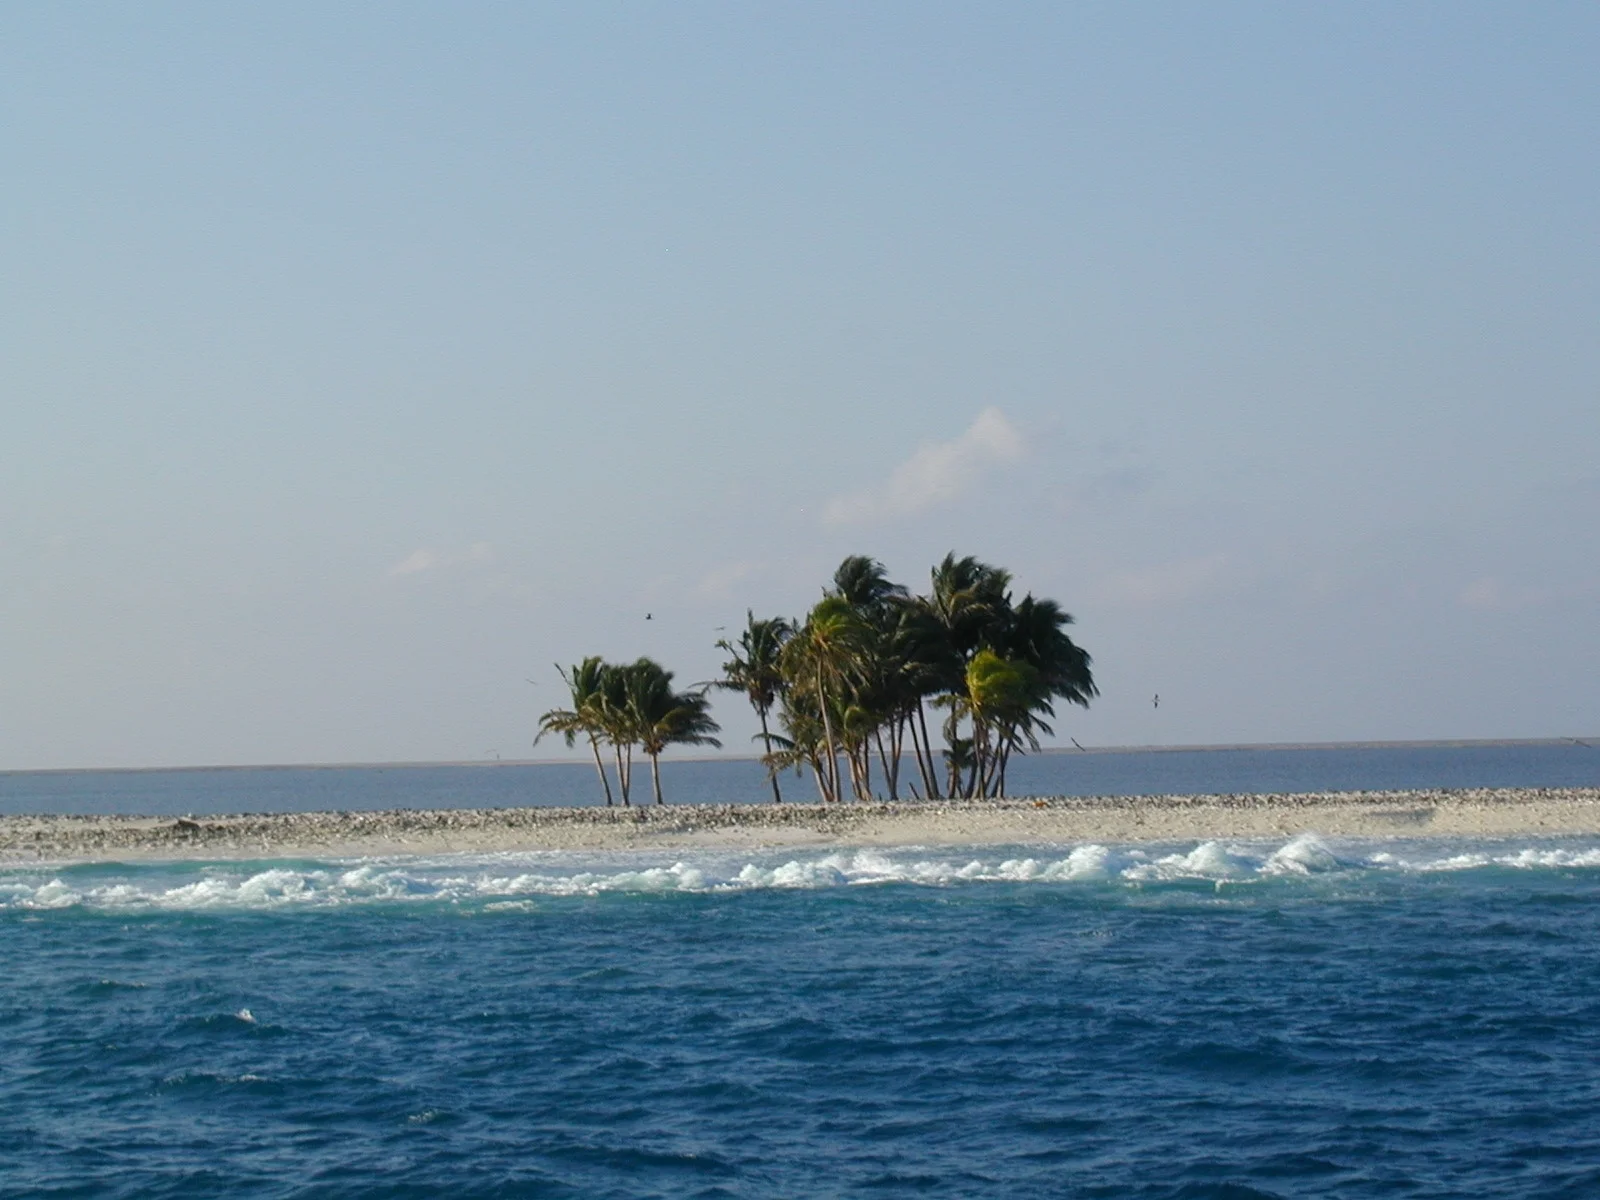
A small patch of trees is the only vegetation on Clipperton Island (source)

A small patch of trees is the only vegetation on Clipperton Island (source)

1. Clipperton Island

This tiny, ring-shaped atoll sits about 1,000 km off the southwest coast of Mexico. It is covered is hard, pointy coral and is battered on all sides by the Pacific Ocean and steady winds. A few palm trees are its only vegetation, there is no fresh water, the island reeks of ammonia, the lagoon around it is devoid of fish (but FULL OF SHARKS) and contains some deep basins including "the bottomless hole"  that has acidic water at its base. 

If this isn't enough to convince you to stay away, the terrible history of the island will.

Having changed hands frequently (it has belonged to the French, US and Mexico), in the early 1900s, Mexico established a colony there, delivering supplies by boat regularly. That is until the Mexican Revolution broke out and the deliveries stopped. Slowly, the inhabitants started dying until all that remained was one man and a handful of women and children. The man decided he was "king" of the island and started raping and murdering the women until they turned on him and he was killed. The last four survivors were rescued soon after, and no one (other then the odd castaway) has occupied the island since. 

One of the few photos of the inhabitants of North Sentinel Island (source)

One of the few photos of the inhabitants of North Sentinel Island (source)

2. North Sentinel Island

Part of the 572 islands in the Bay of Bengal between Myanmar and Indonesia, this island was formally a part of the Republic of India. That is until it was declared "closed" in order to preserve the distinct culture of the people living there. 

For thousands of years, this island has been home to a small tribe called the Sentinels who have violently resisted contact by outsiders. Completely untouched, the inhabitants kill anyone who tries to get near the island, driving off all outsiders with spears and arrows. 

There are estimated to be anywhere between 50-400 of them living on the island that is roughly the size of Manhattan, but because the island is so heavily forested, their buildings are not visible, and no one can get near them, there is really no way to know. (Even Google Earth can't penetrate the tree cover to give us a better look at the individuals living here). 

The last documented contact with these mysterious people was in 2006 when Sentinelese archers killed two fisherman who were within range of the island. The archers later drove off, with arrows, the helicopter that was sent to retrieve the bodies. 

Snake Island from above — nobody's crazy enough to get any closer! (source)

Snake Island from above — nobody's crazy enough to get any closer! (source)

3. Ilha de Queimada Grande (Snake Island)

If you are headed to Brazil, I suggest staying as far away as possible from this untouched paradise. Even the Brazilian Navy has forbid anyone from stepping foot on this island because it is so dangerous!

Why?

Because there are between one and five snakes per square metre living on the island.

And, I'm not talking harmless garter snakes. The palms and sandy beaches of this paradise are populated by a unique species of pit viper called the golden lancehead containing a fast-acting poison that literally melts human flesh. 

Snakes win this one. 

Related Posts


Ocean Safety 101: How to Stay Safe in The Water

by Lindsay Shapka in ,


I realized after taking my 20-something-year-old friend to swim in the ocean for the first time —  and she screamed, jumped and came running at me the moment she saw a miniature crab — that not everyone understands that the ocean is more than just a really big pool.

Not only is it full of living creatures, but the water itself is mysterious, unpredictable and can be really dangerous if you aren't smart when you are out in it. 

Here are a few ocean safety tips to keep you safe when hitting the beach (other then the obvious like wearing sunscreen and staying hydrated, of course).

Watch out for sleeper waves

These waves are the ones that crash further up on the beach than normal and can knock over small children, or people who don't have steady footing, and pull you out to sea. Be careful when walking near the water line along the beach.

When swimming be careful of rip currents

Rip currents are swift rivers of backwash that surge through the surf (the choppy, foamy or discoloured water near the shore). If you are caught in one, DO NOT swim against it. Swim parallel to the beach until you are free of the current, and then head for shore. 

Stay away from rocks, driftwood and piers

Like icebergs, it is hard to tell how big the rock is underneath the water until you have scraped your hands and knees on it. Unexpected currents and large waves can push you into these obstacles as well, causing a lot of damage.

Watch out for reefs

Reefs are pretty easy to spot, they are usually a dark shadow in otherwise clear or blue water. You can also spot them by the waves that usually break over them. Not only can you risk damaging the fragile ecosystem if you step, kick, or otherwise knock into a reef, but a scrape can cause a nasty infection. 

Stay alert for fish and other critters

Jellyfish are usually easy to spot, as are small crabs that are more afraid of you then you are of them. Shuffle your feet when entering the water if you are somewhere that has stingrays present, and never go in the water with open wounds — no need to tempt the sharks! 

When in doubt, ask a lifeguard

The lifeguards are aware of currents, tides, and any type of critters that might be present on the beach. If there are not lifeguards on the beach that you are headed to, do a bit of research ahead of time or, if nothing else, make a conscious decision to be alert and aware of your surroundings.

Related Posts